Showing posts with label tutorial. Show all posts

August 20, 2010

August Challenge


Design Team Member Tere submitted this post for the August Flower Challenge.
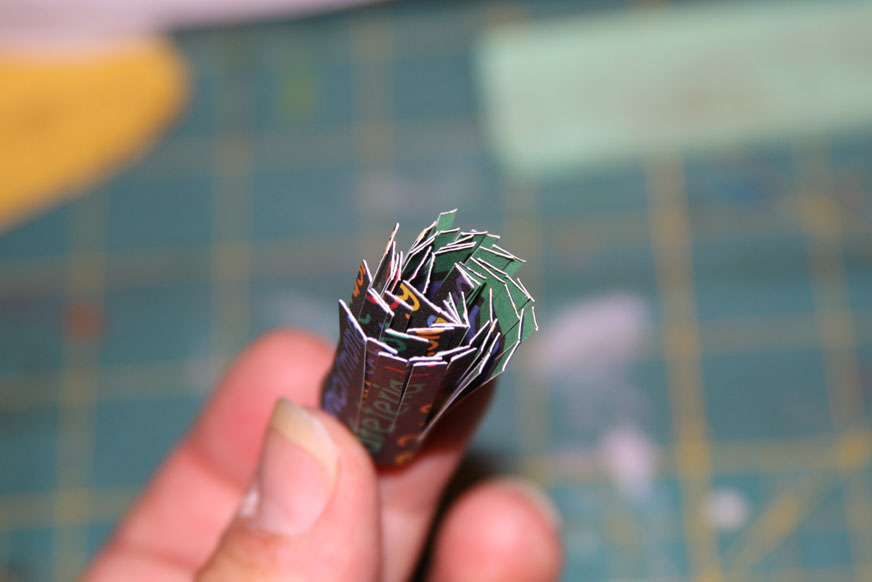
Recently I did a tutorial for a Spanish Speaking Forum. I based it on a video tutorial presented by Hero Arts. Because the members of this forum are from different parts of the world, where scrapbooking supplies are very limited or very expensive; I had to adapt and change the materials used in the Hero Arts tutorial.

I translated the document to English to share with you. I love how the flowers turned out. They can be used for Home Decor, scrapbook layouts, cardmaking, etc.

Hope you like them, as much as I like making this tutorial.


This link will take you to the tutorial: Tissue Paper Flowers Tutorial

Now it's your turn to share your "flower" project. If you use any of the flowers
featured in any of the August Challenge posts - we'd love to see them. Please send a picture and description to Scrappinpsycho@live.com. Your entry will be posted here at Scrap Our Stash and you will be eligible to be chosen as a Guest Design Team Member for the month of October.
Also, don't miss out on the "Pagerize This" Challenge - see all the details below.

August 5, 2010

$$Frugal Friday Tip$$

Design Team Member Wendy contributed this idea for the Frugal Friday Tip. She said, "Today I’m going to show you how to use stamps that you may already have in a new way to create some flowers and make the most out of your stamps!

The first stamp I chose was a butterfly. It is very easy to transform butterfly wings into flowers. For those of you who are more visual learners , I took step-by-step pictures.
1. Stamp multiple butterfly images on scrap paper.

2. Cut out the butterfly wings, you can already see how they look like flower petals.

3. For this project I used another stamp for my stem. Flourish stamps also make great stems or bases for flowers. Next, I added some adhesive (a glue dot works well) to the top of my stem and added the petals. Just rearrange them until they are how you want them. Remember – flowers are not perfect so don’t sweat trying to make it look that way! Also notice that I inked the edges of each of the petals for more distinction. I chose to add both the small and large wings to my flower for a layered look but you could use them to create two flowers, a larger one and a smaller one.


One tip when making your flowers is that it is important to work with an odd number of petals, guaranteed that they will look nicer that way. I used 7 for my large flower and 5 for the layer inside.

4. Last, I added some finishing touches and made a card. See those leaves? Did you guess that those are leftover butterfly wings? I just flipped them over and inked them green!


Supplies used are all CTMH: Embrace Life Stamp Set, Crystal Blue and Sweet Leaf inks, Crystal Blue and Colonial White Cardstock, Crystal Blue Waxy Flax, Sponge Dauber, and Clear Sparkles.

Other stamps that work well to create flowers are hearts and I've get an Easter Egg stamp set that is fun to use. If your not a stamper, diecut shapes and punchies work well too!


We'd love to post your take on this tip - just send a picture of your project along with with details to scrappinpsycho@live.com.

Do you have a frugal tip you'd like to share? Send your tip, along with a picture to scrappinpsycho@live.com. You could be featured as a future Frugal Friday Tip!

August 4, 2010

August Challenge

Not all who wander are Lost - by Kathy


This is a layout of my DGD. When I saw this saying - I knew exactly the picture to use.

I was very excited to finally make some handmade flowers - they seem to be all the rage these days.


I punched out 4 different size circles of patterned paper - and then just crumpled them - I actually kind of folded them into a cone shape - then I just stacked them smallest to largest and placed a brad in the center.


Posted by PicasaCheck out all the cool flowers the Design Team, Guest Design Team and readers have posted so far. How about sharing your Flower project too. See all the details in August Challenge below.

August 2, 2010

August Challenge by Joni

Design Team Member Joni submtted this layout for the August FLOWERS (preferrable Handmade), Challenge. She has also included a tutorial on how she made the "fringe" flowers.

1) Cut a strip of paper...mine is 12x1.5 -- Use double sided patterned paper
(and sorry that my mat is so dirty...it's very heavily used!!)


2) Cut slits fairly thin all the way down the length of the strip and be sure to go pretty deep, but careful not to cut all the way through!

This is what it should look like:
3) Start at one end and roll the strip until you get to the end...(do not adhere yet)
If you did not use double sided paper be sure the pattern that you want is on the inside that you are rolling into the inside (I rolled my stripes inside)

4) The bottom (non-fringe end) will look like this

5) I like mine to be a little "looser", so I release the pressure in my fingers and let the strip "unroll" a little (it just loosens up...) and now looks like this...

6) Back to the fringe cut end... put a glue dot on the "NON CUT" edge and finish the final roll and secure it.

The fringe end will look like this...

7) Set the flower down on your table (fringe side up) and start opening the fringes with your fingers..


8) Keep opening until you get it all opened up and how you want it...you can even crumple it a little if you want. (I didn't crumple mine)

Here is a smaller flower on the left that i did and the larger one in the tutorial on the right. I used a stripe paper so you could get a good visual of the process.

Now it's your turn to take the challenge. You can either submit a project using any kind of flower or you can submit a project using one of the flowers shared in the tutorial. Just send a picture along with a description of your project to Scrappinpsycho@live.com. You could be chosen as a Guest Design Team member. See all the details in August Challenge below.

August 1, 2010

August Challenge


Guest Design Team Member Angie created this layout for the August Flower Challenge. She provided the following information on the creation of her flowers.
Posted by PicasaI cut my flower petals out of claudine hellmuth sticky-back canvas. Then I sprayed them with Glimmer Mist added a homemade dew drop in the center and there ya have it.
Will you take the Flower Challenge. See all the details below in August Challenge.

May 30, 2010

Rosette Tutorial by Belinda


After Belinda submitted this card for the May "Get Out of Your Box" Challenge there were a lot of comments requesting a tutorial fort he rosette. You can find her tutorial HERE.Posted by Picasa

Thanks Belinda!

May 4, 2010

May Challenge

Thank You Easel Card by Joni
Posted by PicasaDesign Team Member Joni created this card for the May "Out of Your Box" Challenge. This is what she had to say, "OMG...I made a card...and it turned out pretty nice too. Now, this is outside my box because I don't DO cards. I don't really want to...I'm a scrapbooker. Ok, but this is cute...and I made it for my son's Kindergarten teacher for the "end of the school year". I keep seeing those "easel" cards...so I tried it. Here it is (folded on the easel). Now, I've got to be honest here...since I don't DO cards....this card took me about 3 hours to make. (longer than most scrapbook pages) .... I gues getting outside your box takes time and patience. Ahh...big sigh. "
Design Team Member Tere provided this Ytube Link to a Easel card Tutorial. HERE
Now it's your turn - to take the challenge and "Get Out of Your Box". See all the details in the May Challenge post below.
Also, don't forget to vote for the Spring Cleaning Challenge Winner - and become a follower or leave comments for a chance to win the prize package from our Sponsor A Little Dash of This and That - see the details in the Follow Me post below.